REST API ?
RESTful API ?
OpenAPI? Open API Specification ?
Swagger?
API について調べていると、疑問が疑問を生みなかなか抜け出せなかったです。。
なんとか抜け出せたので、参考にしてみて下さい!!
REST API とは?
もう先輩方がまとめているので、ここではシンプルに。
- API 用の URL がある
- HTTP メソッド (GET, POST 等) でリクエストする
- JSON や XML のレスポンスが返ってくる
- REST API はアーキテクチャ (= 考え方) で、このアーキテクチャに沿って作られたのが RESTful API
うん。分かりやすい。笑
参考:
– REST入門 基礎知識
– 0からREST APIについて調べてみた
OpenAPI と Swagger とは?
こちらもまとめられているので、シンプルに。
- OpenAPI = 仕様 (RESTful API のドキュメントの書き方など)
- Swagger = OpenAPI に沿ったドキュメント等を作成するツール
うん。やっぱり分かりやすい。笑
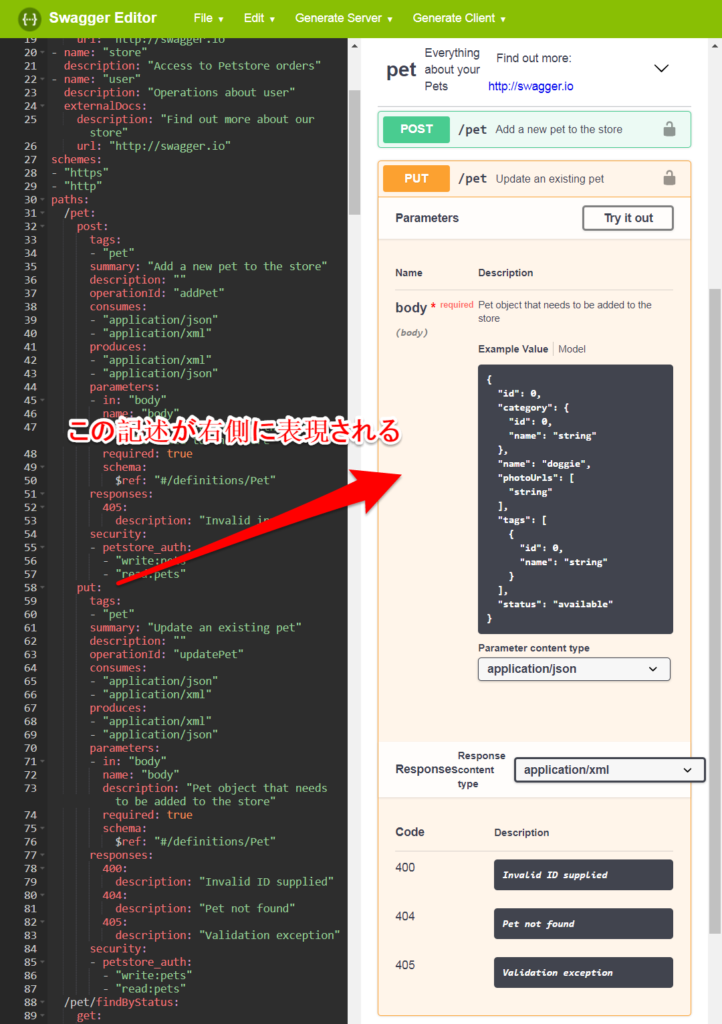
こちらが swagger のサンプルです。

参考:
– What Is the Difference Between Swagger and OpenAPI?
connexion モジュールを使って実際に作ってみる
百聞は一見にしかず!!
実際に自分で書いてみましょ。
ゼロから作るのもいやなので、connexion という便利モジュールを使います。
connexion とは?
Flask を使ったフレームワークで、YAML 形式で書かれた OpenAPI を解釈して、自動的に API エンドポイントを作ってくれるモジュールです。
自力で Python に GET のときは~、POST のときは~ と書かずに、OpenAPI 仕様を決めたら読み込むだけ!で動作してくれる優れものです。。
サンプルコードの構成
FOLDER
├─app.py
├─user.py
├─swagger.yml
└─template
└─index.html
実際のコード
まずは、必要なモジュールを pip install しましょ。
pip install flask connexion
app.py にて app を作成し、エンドポイント情報を記述した yaml ファイルをインポートします。
from flask import render_template
import connexion

# Flask() の代わりに connexion.App() を使う
app = connexion.App(__name__, specification_dir='./')

# swagger.yml ファイルの読み込み
app.add_api('swagger.yml')


@app.route('/')
def index():
    return render_template('index.html')


if __name__ == '__main__':
    app.run(debug=True)
そしてこちらが、インポートする yaml ファイルです。
これで、ドキュメントができてエンドポイントもできるなんて便利な世の中ですね。。笑
swagger: "2.0"
info:
  description: swagger サンプルファイル
  version: "1.0.0"
  title: Swagger REST API
consumes:
  - "application/json"
produces:
  - "application/json"

basePath: "/api"

# ここで URL パスと HTTP メソッドを定義
paths:
  /user:
    get:
      # python ファイルの <package_name>.<function_name>
      operationId: "user.read"
      tags:
        - "User"
      summary: "The people data structure supported by the server application"
      description: "ユーザーリストの読み込み"
      responses:
        200:
          description: "ユーザーリスト読み込み成功"
          schema:
            type: "array"
            items:
              properties:
                first_name:
                  type: "string"
                last_name:
                  type: "string"
                timestamp:
                  type: "string"
データベースに接続したかったのですが、ここはシンプルにしたかったので、直書きしています。笑
from datetime import datetime

def get_timestamp():
    return datetime.now().strftime(("%Y-%m-%d %H:%M:%S"))

# API レスポンス用のサンプルデータ
USER = {
    "AAA": {
        "first_name": "aaa",
        "last_name": "AAA",
        "created_at": get_timestamp()
    },
    "BBB": {
        "first_name": "bbb",
        "last_name": "BBB",
        "created_at": get_timestamp()
    },
    "CCC": {
        "first_name": "ccc",
        "last_name": "CCC",
        "created_at": get_timestamp()
    },
    "DDD": {
        "first_name": "ddd",
        "last_name": "DDD",
        "created_at": get_timestamp()
    }
}

# GET リクエストでレスポンスする用関数
def read():
    response = [USER[key] for key in sorted(USER.keys())]
    return response
HTML はなくてもよいのですが、一応こちらです。
<!DOCTYPE html>
<html lang="en">
<head>
    <meta charset="UTF-8">
    <meta name="viewport" content="width=device-width, initial-scale=1.0">
    <meta http-equiv="X-UA-Compatible" content="ie=edge">
    <title>connexion sample</title>
</head>
<body>
    <h1>サンプルページ</h1>
    <p>http://localhost:5000/api/user/ への GET でリスト取得</p>
</body>
</html>
参考:
– connexion モジュールのドキュメント(英語)
– connexion モジュールの github ページ(英語)
書籍でもっと詳しく知りたい方
私はもうお腹いっぱいですが、もう少し勉強したい方は下記参考にしてみてください。